
I feel like I’m doing this wrong. In my mind, there exists a tool such that I adjust a few sliders and every color in the image (or on that layer) changes. In this way, I can adjust all the many shades of “yellow” and make them into corresponding shades of say “green.” I feel like a more powerful tool can do this. Or, that LibreSprite IS a more powerful tool, and I just don’t know what I am looking for. Perhaps some kind reader will enlighten me…
In our previous post, we discussed making a new sprite from scratch in LibreSprite. We did cheat a little by using an existing sprite to trace and guide our design. This was done to keep our power up sprites as consistent as possible given we did not have the original design files.
Having done one though, we are now ready to make our second custom sprite using the one we previously created. Hopefully, this will be much easier than our previous effort. I basically want to do only two things. Change the name of the Power Up and change the color accents. Each of these has two parts to it giving us the following checklist.
- Change the color of the “Target Layer”
- Change the color of the “Shield” Layer
- Change the Name of the Power Up
- Change the shape of the Name Box framing the Power Up name.
LibreSprite has a concept of a “Color Palette.” That’s the collection of color boxes you can select from on the left. Generally, this is used by an artist to restrict the actual colors used within the art. This keeps the color consistent throughout the image and from image to image. All the work we have done so far has just used the default color palette.
While I have not found a single magical slider that magically changes all the colors (and only the colors) I want we will have to take advantage of a feature of LibreSprite known as an “Indexed” color palette. An indexed color palette assigns a number to every color square in the palette. This in turn assigns that number to every pixel in the image using that color. By doing this, we can adjust the color of each square in the palette, and they will automatically modify any and all pixels assigned that index.
But, there’s a catch. So far as I know, there is no way to be selective in the way this is used. You cannot seem to assign an indexed color palette to just one layer. It is applied to the entire image. This has two evil side effects.
The first is somewhat of a mystery. LibreSprite has a feature allowing you to create a color palette from the current image. However, every time I tried this, it made some subtle changes to colors I did not want changed.
Second, since the indexed color palette is assigned to the entire image (all layers) I am not able to adjust all the “yellows” in one layer without doing so in all layers.
To combat this, we will make a copy of each of the layers we want to modify and save them as individual files. Since LibreSprite will allow us to open multiple sprites at the same time and cut-n-paste between them, we can isolate the changes we want to make to just the layers we want and cut-n-paste them back.
To get this started, make a copy of our PowerUp4_0008_00000.ase to PowerUp5_0008_00000.ase and open up PowerUp5. Then use File -> New to create a new image the same size (512×512 px). For now, you can leave the Color Mode as RGB. We will actually switch back and forth between RGB and Indexed. Leave the Background as Transparent.
In PowerUp5, hide all layers except the shield. It is now as simple as Ctrl-A, Ctrl-C in PowerUp5 and Ctrl-V in our new file to copy the image over. (Ctrl-D will deactivate the selection box) Save the file as PowerUp5_Shield.ase. For the sake of completeness, you can save another copy as PowerUp4_Shield.ase as well so we have it for any future changes.
Before we can save our color palette for the “Shield” layer we may have to perform one intermediate step. Right click on the layer and select “Properties.” In that dialog, change the “Mode” from “Overlay” to “Normal.”
In our PowerUp5_Shield file, select the hamburger icon in the upper right of the color pallet and select “Create Palette from Current Sprite.”
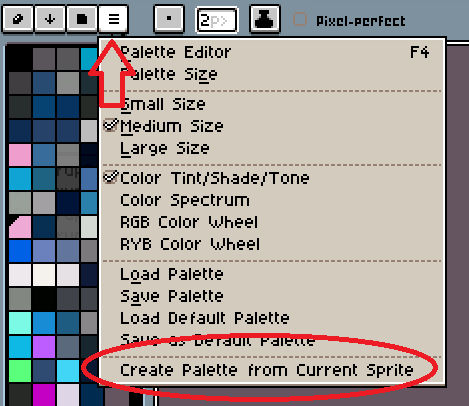
Accept the default values of “Create new palette with 256 colors or less” and “Create entries with alpha component.” We will end up with far less than 256 colors, so the limit doesn’t matter. Because we used the blurring tool when we originally created this, we want to make sure we save a color palette with alpha settings which sets opacity as well as color. Strictly speaking, this is RGBA, not just RGB.
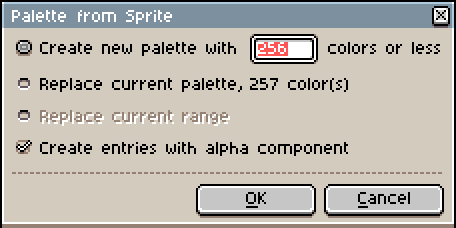
To save this, select the hamburger menu above the color pallet again then select “Save Palette.”
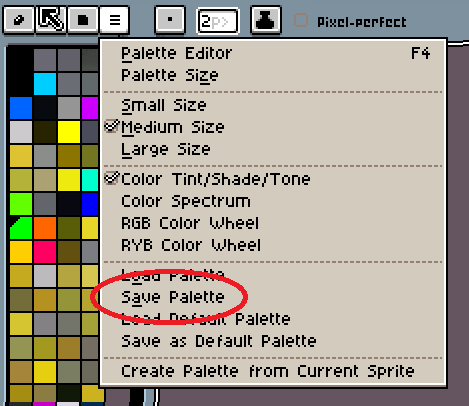
Because we have not modified this yet, you can save it as PowerUp4_Shield.ase to have for future use. If you want (which I did) you can create a sub directory and save your file. I named the folder “Color_Palettes” and prefixed all the color palettes with the name of the power up.
Now, whenever we edit a layer, we will take the extra step of loading of the color palette specific to that layer. When we make changes, we will save it.
Next, we need to change our shield sprite from RGB to Indexed so when we change the colors in the palette, they change in the image. Do this by selecting Sprite -> Color Mode -> Indexed (Ordered Dither) from the menu. My understanding (and through minimal testing) selecting the dithered option should give a smoother transition from RGB to Indexed.
The UI is a little wonky, but you can Shift-Left Click and drag over the color boxes in the color palette to select all the colors except black. When you fly over the boxes after selecting, you should see all the boxes surrounded by a yellow border. It may just flash quickly.
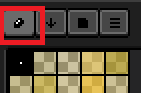
Next, open the Palette Editor. This can be done with the F4 key or by selecting the “Edit Color” icon at the top left of the color palette. Then select the “HSB” and “Rel” buttons. By doing this, we can change the “Hue” of all the colors we have selected by some “Relative” amount. In fact, we will change it by 330 degrees.
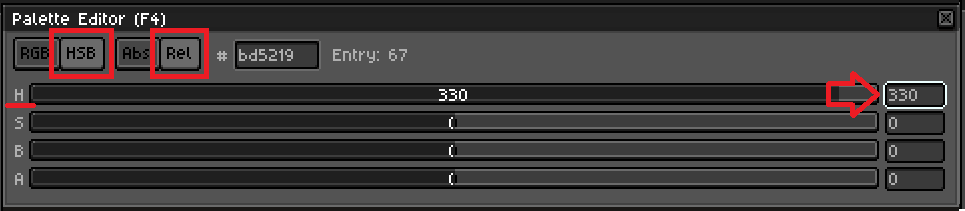
If you visualize hue as a color wheel, this will rotate our color 330 degrees around the wheel, starting from whatever “yellow-ish” color it currently is to something “orange-ish.” If you are bored, you can monkey with different values to see what colors you end up with.
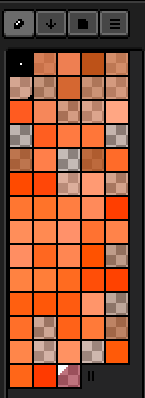
Now we want to save this new palette for the future. Name it (or overwrite the one you have if you saved it earlier) as PowerUp5_Shield.ase.
Back in our main image, PowerUp5_0008_00000.ase, we can now create a new layer. We can then copy and paste this new one back. It will come in as an RGBA color mode, because that is what our main image is. We do not need the color palette we saved. Make sure you copy this new image into every cell/frame of the new layer. Right click on our new layer and select Properties to change the name and set Mode to Overlay. Lock your layer when you are done. You can now hide or remove the old shield layer.
The process for updating the “Target” layer is exactly the same.
- Create New File (512×512)
- Name it <PowerUp Name>_<Layer>.ase
- In main file, hide all layers except the one we want to copy
- Copy and Paste needed layer it into our new file.
- Create Palette (Options -> Create Palette from Current Sprite)
- Conver Color Mode to Indexed. Sprite -> Color Mode -> Indexed (Ordered Dither)
- Shift-Select color boxes in palette
- Edit Color (Palette Editor – F4)
- HSB and Rel
- Hue (H) 330
- Save Palette
- Copy and Paste back to main image file
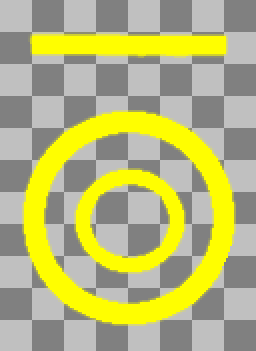
In our next episode, we fix the text for our new PowerUp.