


Although we have nothing to shoot at yet, it’s time to create our lasers. We will learn several new things about game object creation. Top of the list is the concept of prefabs. Prefabs are master copies from which we can clone, or copy new game objects. Remember, every laser fired is a new game object. The most efficient way to quickly create every new laser shot, is have one prebuilt we can make copies of. That’s what a “prefab” is.
Interacting with prefabs, which are in the Project View, and game objects in the Scene Hierarchy or Scene View can get tricky. Changes made to game objects apply only to that game object. But changes made to the prefab apply to all copies. This does allow for some interesting approaches. You can make changes to an existing game object to test it. If it looks good, using the Apply Overrides option will copy the changes from the game object back to the prefab.

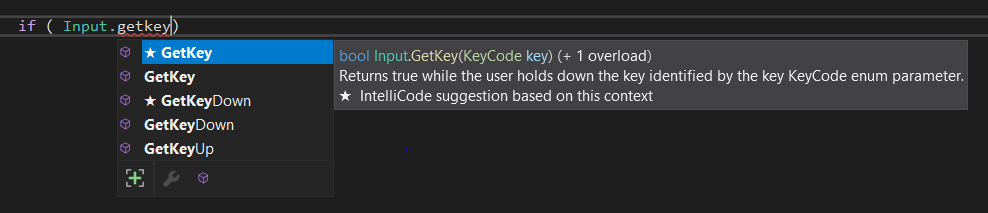
Now that we have our prefab, we can start writing code to invoke, or instantiate it. In good “Hello, World!” style, we’ll start with the simplest code possible. In this case, that would be determining how we are going to actually trigger the laser instantiation. In this case, we will fire a laser every time we press the spacebar. So before we actually create a laser, let’s just make sure we can detect when the spacebar has been pressed. Fortunately, we’ve already done something similar in our player movement. We need to use the Input manager again. But this time, it is not the x and y axes we are looking for. Instead we want the GetKeyDown() method.
It’s worth noting the video shows and explains the difference between GetKey(), GetKeyDown() and GetKeyUp(). GetKeyDown() and GetKeyUp() are nice and obvious, but when we get in a rush, it is easy to forget they even exist and choose GetKey() instead. In fact, I recently ran across a cry for help from one new developer who did exactly that. He did not understand why he had to hold the key down for his action to fire and why every time he released the key it stopped. But that is exactly how GetKey() is intended to work. In other words, he used the wrong function.
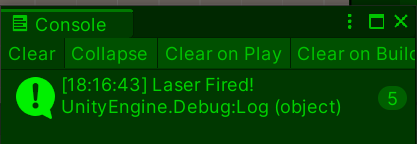
Armed with that knowledge, we add a new if() statement to our Update() method. We want it in the Update() method so our game checks for the keypress every frame (remember, that is 60 times per second!). The Debug.Log() statement should send a message to the bottom of the Game View as well as to the Console View.
    void Update()
    {
        CalculateMovement();

        if (  Input.GetKeyDown(KeyCode.Space) )
        {
           Debug.Log("Space Key Pressed");
        }
    {
It’s important to start simple, or if you didn’t, to go back to something simple if it fails to work. Had we gone straight to laser instantiation and it didn’t work, we would not know if there was a problem with the laser prefab, the instantiation call or the key press detection. Now we know we have the keypress detection working, we can replace the Debug.Log() statement with something interesting.
If you happen to be following along in the video, pay close attention to what is happening on screen. If you’re not watching the video go back and do so. We are about eight minutes in on the “Instantiate Laser” module. There is a lot going on here and the code is actually the least interesting part of it.
As an “old dog” my first impression of the Unity Editor was in the context of building a game. I saw it as a workshop where I can assemble all the bits and pieces of my game. I’ll admit, I never made much use of debuggers in other IDEs so I was a little slow to realize the Unity Editor is not only a good place to assemble my game, it’s a good place to see what’s going on with my game!
We’ve already seen what can be done with the Debug.Log() function. Messages sent using Debug.Log() are sent both to the status line under the Game View ![]() as well as to the Console View.
as well as to the Console View.

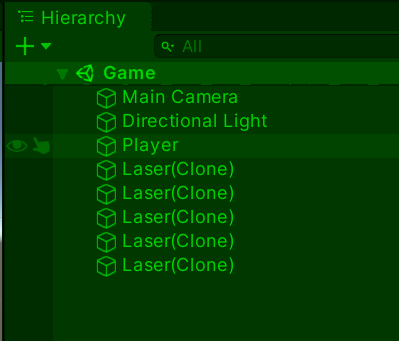
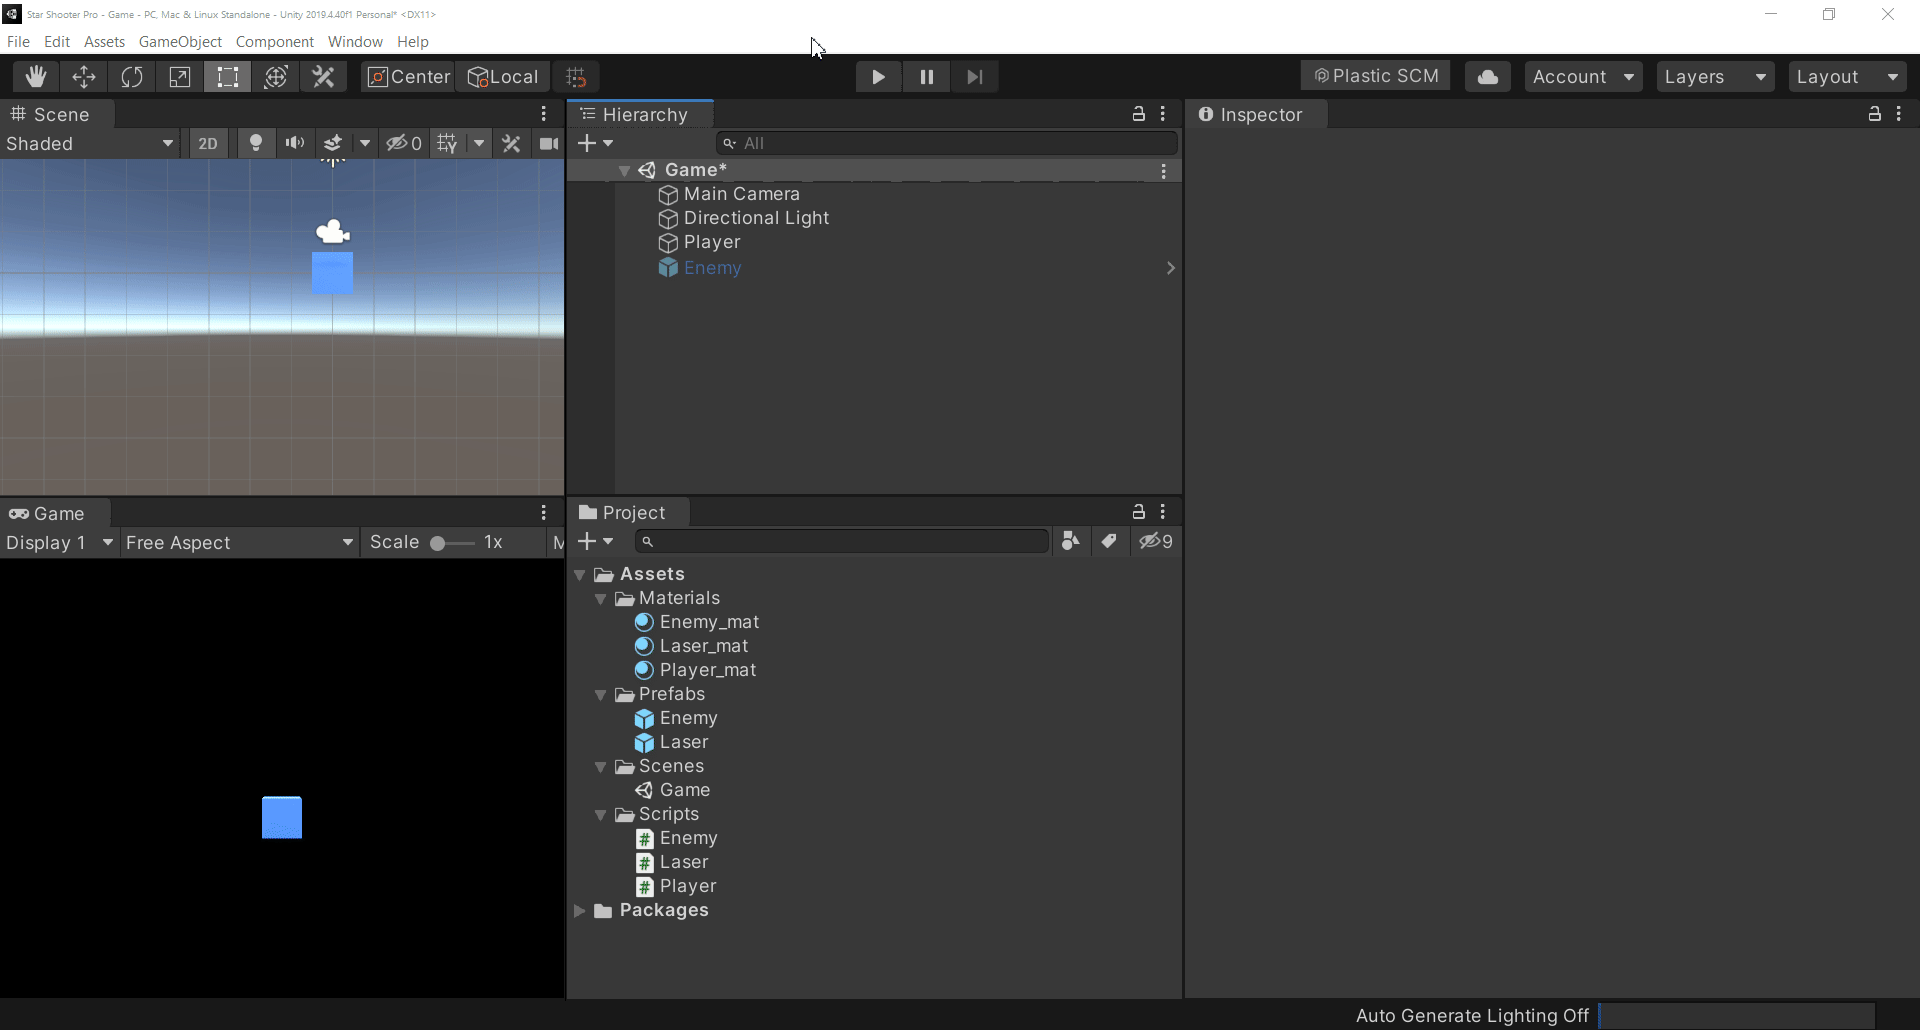
But did you notice the Scene Hierarchy View? The video mentioned it, but only briefly. In the very first demonstration, the laser was appearing, but it seemed that only one showed up. Looking at the Hierarchy View however, we realize it is working, just not the way we expected it to!
What’s happening is something not immediately obvious, at least to me at the time. I understood the Hierarchy View would have any game objects I put there while creating the game (like the Player Game Object). What I did not initially notice was game objects would also appear there when instantiated during game play. Whoa…
But thinking more on that, it makes sense right? After all, when we create an object and put it directly into the Hierarchy/Scene View, we are really just instantiating it the hard way. This little tidbit will come in handy later when we are creating Enemy game objects, PowerUps or otherwise trying to debug something that went off screen and is no longer visible in the game.
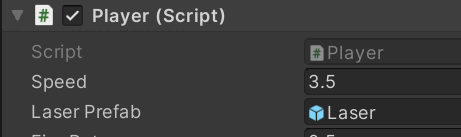
But wait! There’s more. We’re about to instantiate a laser by making a copy of it from the prefab. Now, I happen to know we need to somehow grab a reference, pointer, handle, use your choice of name, but somehow, we have to know, programmatically, where the Laser prefab even is! Well, Unity has a backdoor for us on this one. We don’t have to do it in code at all! In fact, we can use a couple techniques we’ve already seen. First, we make a variable in the code visible in the Inspector. This can be done either by making the variable public or using the [SerializeField] attribute. We’ve already done this for the Speed variable. Next, we’re going to do another thing we’ve already seen. We are going to drag the object we want and drop it into our variable. In this case, the Laser prefab.
Look ma! No code! To be honest, this is almost more fun than playing the game.
We now have all the pieces we need to create our laser. The videos will now take you through the process of instantiating the laser and creating the laser behavior. The laser behavior is the easiest, so let’s look at that first. The code is again, really simple. It only has to do two things. As soon as it is instantiated, it needs to go up, then destroy itself when it gets off screen. We add a single variable to the mix to control the speed of the laser.
public class Laser : MonoBehaviour
{
    [SerializeField]
    private float _speed = 8.0f;

    // Update is called once per frame
    void Update()
    {

        transform.Translate(Vector3.up * _speed * Time.deltaTime);

        if (transform.position.y > 8f)
        {
            Destroy(this.gameObject);
        }

    }
}
The transform.Translate() method we already saw in the setup videos when we were just making the player block move on its own. It takes a single Vector3() to dictate direction. In this case, we use the convenience vector Vector3.up which is equivalent to Vector3(0,1,0) which we then multiply by our _speed variable and by Time.deltaTime. After that, we just keep checking until the laser is off screen (transform.position.y > 8f) and then call Destroy(). Once we’ve created the script, drag and drop it onto the Laser prefab.
Now, let’s test it out. I know it sounds a bit counter-intuitive to check the laser behavior before we figure out how to even fire the laser. But that’s when working in the Unity Editor starts to get really cool. Remember how I said above placing a game object in the Scene or Hierarchy View is the same as instantiating that object programmatically? Well, let’s do that. Drag the Laser prefab from the Project View, into the Hierarchy View. Change the starting Y coordinate to 1, just so we can see it, then hit play.
As you can see, as soon as the game play starts (screen goes green), the Laser snaps into position, and proceeds to travel up. It goes by a little fast, but if you watch the Inspector, you will see the Y coordinate start going up. Once it hits 8, the Destroy() method deletes the Laser game object and it disappears from the Hierarchy view. When we stop the game play (screen goes back to default grey color) the Laser reappears in our Hierarchy, ready to play again. This is the power the Unity Editor gives us. We can pause game play, we can change variables to slow things down or speed them up and we have multiple panels or views other than just the Game View, displaying real-time data we can watch and use for debugging.
At this point, we have shown we can detect the Spacebar being pressed, and our Laser, once instantiated, will travel up the screen, and destroy itself once it is off screen. Now, all we have to do is connect these functions up. The video walks you through a process if modifying our if () statement that checks for the keypress and instantiates the Laser. It then walks you through creating the cooldown mechanism and implementing it so the player cannot just spam the fire button. But sometimes, it can be just as effective to go the other direction. Similar to writing pseudo code, we can write our live code in a readable manner, and implement the missing pieces. Here, I’ll demonstrate.
We want to check if the Spacebar has been pressed and our cooldown time has expired. If it has, we can fire the laser. As we determined earlier, we want to check this every frame. So let’s write that and add it to our Update() method.
    void Update()
    {
        CalculateMovement();

        if (  Input.GetKeyDown(KeyCode.Space)
           && Time.time > _canFire) { FireLaser(); }

    }
Instead of pseudo code, that is real code that is just as readable. We haven’t defined the variable _canFire yet, nor have we defined the FireLaser() function. But now we know we need to.
What does our FireLaser() function need to do? Well, at the very least, it needs to fire (instantiate) the laser. So, we do that.
    void FireLaser()
    {
        Instantiate(_laserPrefab, transform.position + new Vector3(0, 0.9f, 0), Quaternion.identity);
    }
This one line does what we did earlier by dragging the Laser prefab into the Hierarchy View. It relies on having created the _laserPrefab variable and having dragged the Laser prefab into the field in the Inspector. Instead of setting the position to a predetermined value as we did earlier, we set the position to the same position as our Player game object and adjust the Y value so it appears just in front of our Player object. For rotation, we use the convenience value of Quaternion.identity to signify no rotation.
The last thing needed is our cooldown variable, _canFire. Now this can be done in many different ways. The approach used in the video is pretty straight forward. Get the current time and add our cooldown factor to it. Then, as shown above, our check does nothing more than check the new current time with our calculated _canFire time. As soon as the current time exceeds that, FireLaser()can be called again.
The question we ask ourselves now is, “Where do we make this calculation?” The concept mentioned, though briefly, in the video is “Separation of Concerns.” This refers to bundling code into related sections, or in this case, methods (functions). At the moment, our FireLaser() method has only a single line in it. At first blush, putting this line in its own method might seem a bit excessive, even if it does make the code nicely readable. (Actually, I think that is in fact, sufficient reason) However, we already know there will be more to firing lasers than just setting them off. We have one rule (the cooldown) already. Creating the FireLaser() method gives us a place to put these things. Adding that, we get the following.
void FireLaser()
{
    _canFire = Time.time + _fireRate;
    Instantiate(_laserPrefab, transform.position + new Vector3(0, 0.9f, 0), Quaternion.identity);
}
It make sense to put this here, because we only want to calculate a new fire time, when we actually fire the laser. Now that we are calculating our next fire time, we still have two tasks. First, we have created a new variable, _fireRate that needs defined. Second, even though we are calculating our _canFire time, we still have not created (declared) that variable yet. The way we have it setup now, _canFire needs to be accessible in two different methods; FireLaser() and Update(). Therefore, _canFire at least needs to be defined at the class level. With _fireRate however, we have a choice. It only needs to be accessible within the FireLaser() method. It is not used anywhere else. But, if we want other developers, testers, etc. to be able to change this value without going directly to the code, i.e. if we want it to show up in the Inspector, we need to define it at the class level also. This is the reasoning assumed by the video.
Before we look at the final code, I leave you with this one last thought. As you already know, aside from those defined by Unity, or other classes, variable and function names can be anything (as long as they use only valid characters). This means, between variables and methods, you can create your own “language.” This language can be very close to pseudo code, or even English (or your language of choice). This gets you one step closer to self-documenting code; code that tells more than how it does things, it also tells you what it is doing and even why.
With those decisions, we end up with the following:
using System.Collections;
using System.Collections.Generic;
using UnityEngine;

public class Player : MonoBehaviour
{

    [SerializeField]
    private float _speed = 3.5f;
    [SerializeField]
    private GameObject _laserPrefab;
    [SerializeField]
    private float _fireRate = 0.5f;
    [SerializeField]
    private float _canFire = -1f;

    // Start is called before the first frame update
    void Start()
    {

        transform.position = new Vector3(0, 0, 0);

    }

    // Update is called once per frame
    void Update()
    {
        CalculateMovement();

        if (  Input.GetKeyDown(KeyCode.Space)
           && Time.time > _canFire) { FireLaser(); }

    }

    void CalculateMovement()
    {

        // get position information
        float horizontalInput = Input.GetAxis("Horizontal");
        float verticalInput = Input.GetAxis("Vertical");
        Vector3 direction = new Vector3(horizontalInput, verticalInput, 0);

        // set next position
        transform.Translate(direction * _speed * Time.deltaTime);

        //check screen boundaries
        transform.position = new Vector3(transform.position.x, Mathf.Clamp(transform.position.y, -3.8f, 0), 0);
        if (Mathf.Abs(transform.position.x) >= 11.5f) { transform.position = new Vector3(transform.position.x * -1, transform.position.y, 0); }

    }

    void FireLaser()
    {
        _canFire = Time.time + _fireRate;
        Instantiate(_laserPrefab, transform.position + new Vector3(0, 0.9f, 0), Quaternion.identity);
    }

}using System.Collections;
using System.Collections.Generic;
using UnityEngine;
public class Laser : MonoBehaviour
{
[SerializeField]
private float _speed = 8.0f;
// Start is called before the first frame update
void Start()
{
}
// Update is called once per frame
void Update()
{
transform.Translate(Vector3.up * _speed * Time.deltaTime);
if (transform.position.y > 8f)
{
Destroy(this.gameObject);
}
}
}